


Homework: add more to your website!
Our blog has come a long way but there's still room for improvement. Next, we will add features for post drafts and their publication. We will also add deletion of posts that we no longer want. Neat!
Save new posts as drafts
Currently when we're creating new posts using our New post form the post is published directly. To instead save the post as a draft, remove this line in blog/views.py in the post_new and post_edit methods:
post.published_date = timezone.now()
This way, new posts will be saved as drafts that we can review later on rather than being instantly published. All we need now is a way to list and publish drafts, let's get to it!
Page with list of unpublished posts
Remember the chapter about querysets? We created a view post_list that displays only published blog posts (those with non-empty published_date).
Time to do something similar, but for draft posts.
Let's add a link in blog/templates/blog/base.html in the header. We don't want to show our list of drafts to everybody, so we'll put it inside the {% if user.is_authenticated %} check, right after the button for adding new posts.
<a href="{% url 'post_draft_list' %}" class="top-menu">{% include './icons/pencil-square.svg'%}</a>
Next: urls! In blog/urls.py we add:
path('drafts/', views.post_draft_list, name='post_draft_list'),
Time to create a view in blog/views.py:
def post_draft_list(request):
    posts = Post.objects.filter(published_date__isnull=True).order_by('created_date')
    return render(request, 'blog/post_draft_list.html', {'posts': posts})
The line posts = Post.objects.filter(published_date__isnull=True).order_by('created_date') makes sure that we take only unpublished posts (published_date__isnull=True) and order them by created_date (order_by('created_date')).
Ok, the last bit is of course a template! Create a file blog/templates/blog/post_draft_list.html and add the following:
{% extends 'blog/base.html' %}

{% block content %}
    {% for post in posts %}
        <div class="post">
            <p class="date">created: {{ post.created_date|date:'d-m-Y' }}</p>
            <h1><a href="{% url 'post_detail' pk=post.pk %}">{{ post.title }}</a></h1>
            <p>{{ post.text|truncatechars:200 }}</p>
        </div>
    {% endfor %}
{% endblock %}
It looks very similar to our post_list.html, right?
Now when you go to http://127.0.0.1:8000/drafts/ you will see the list of unpublished posts.
Yay! Your first task is done!
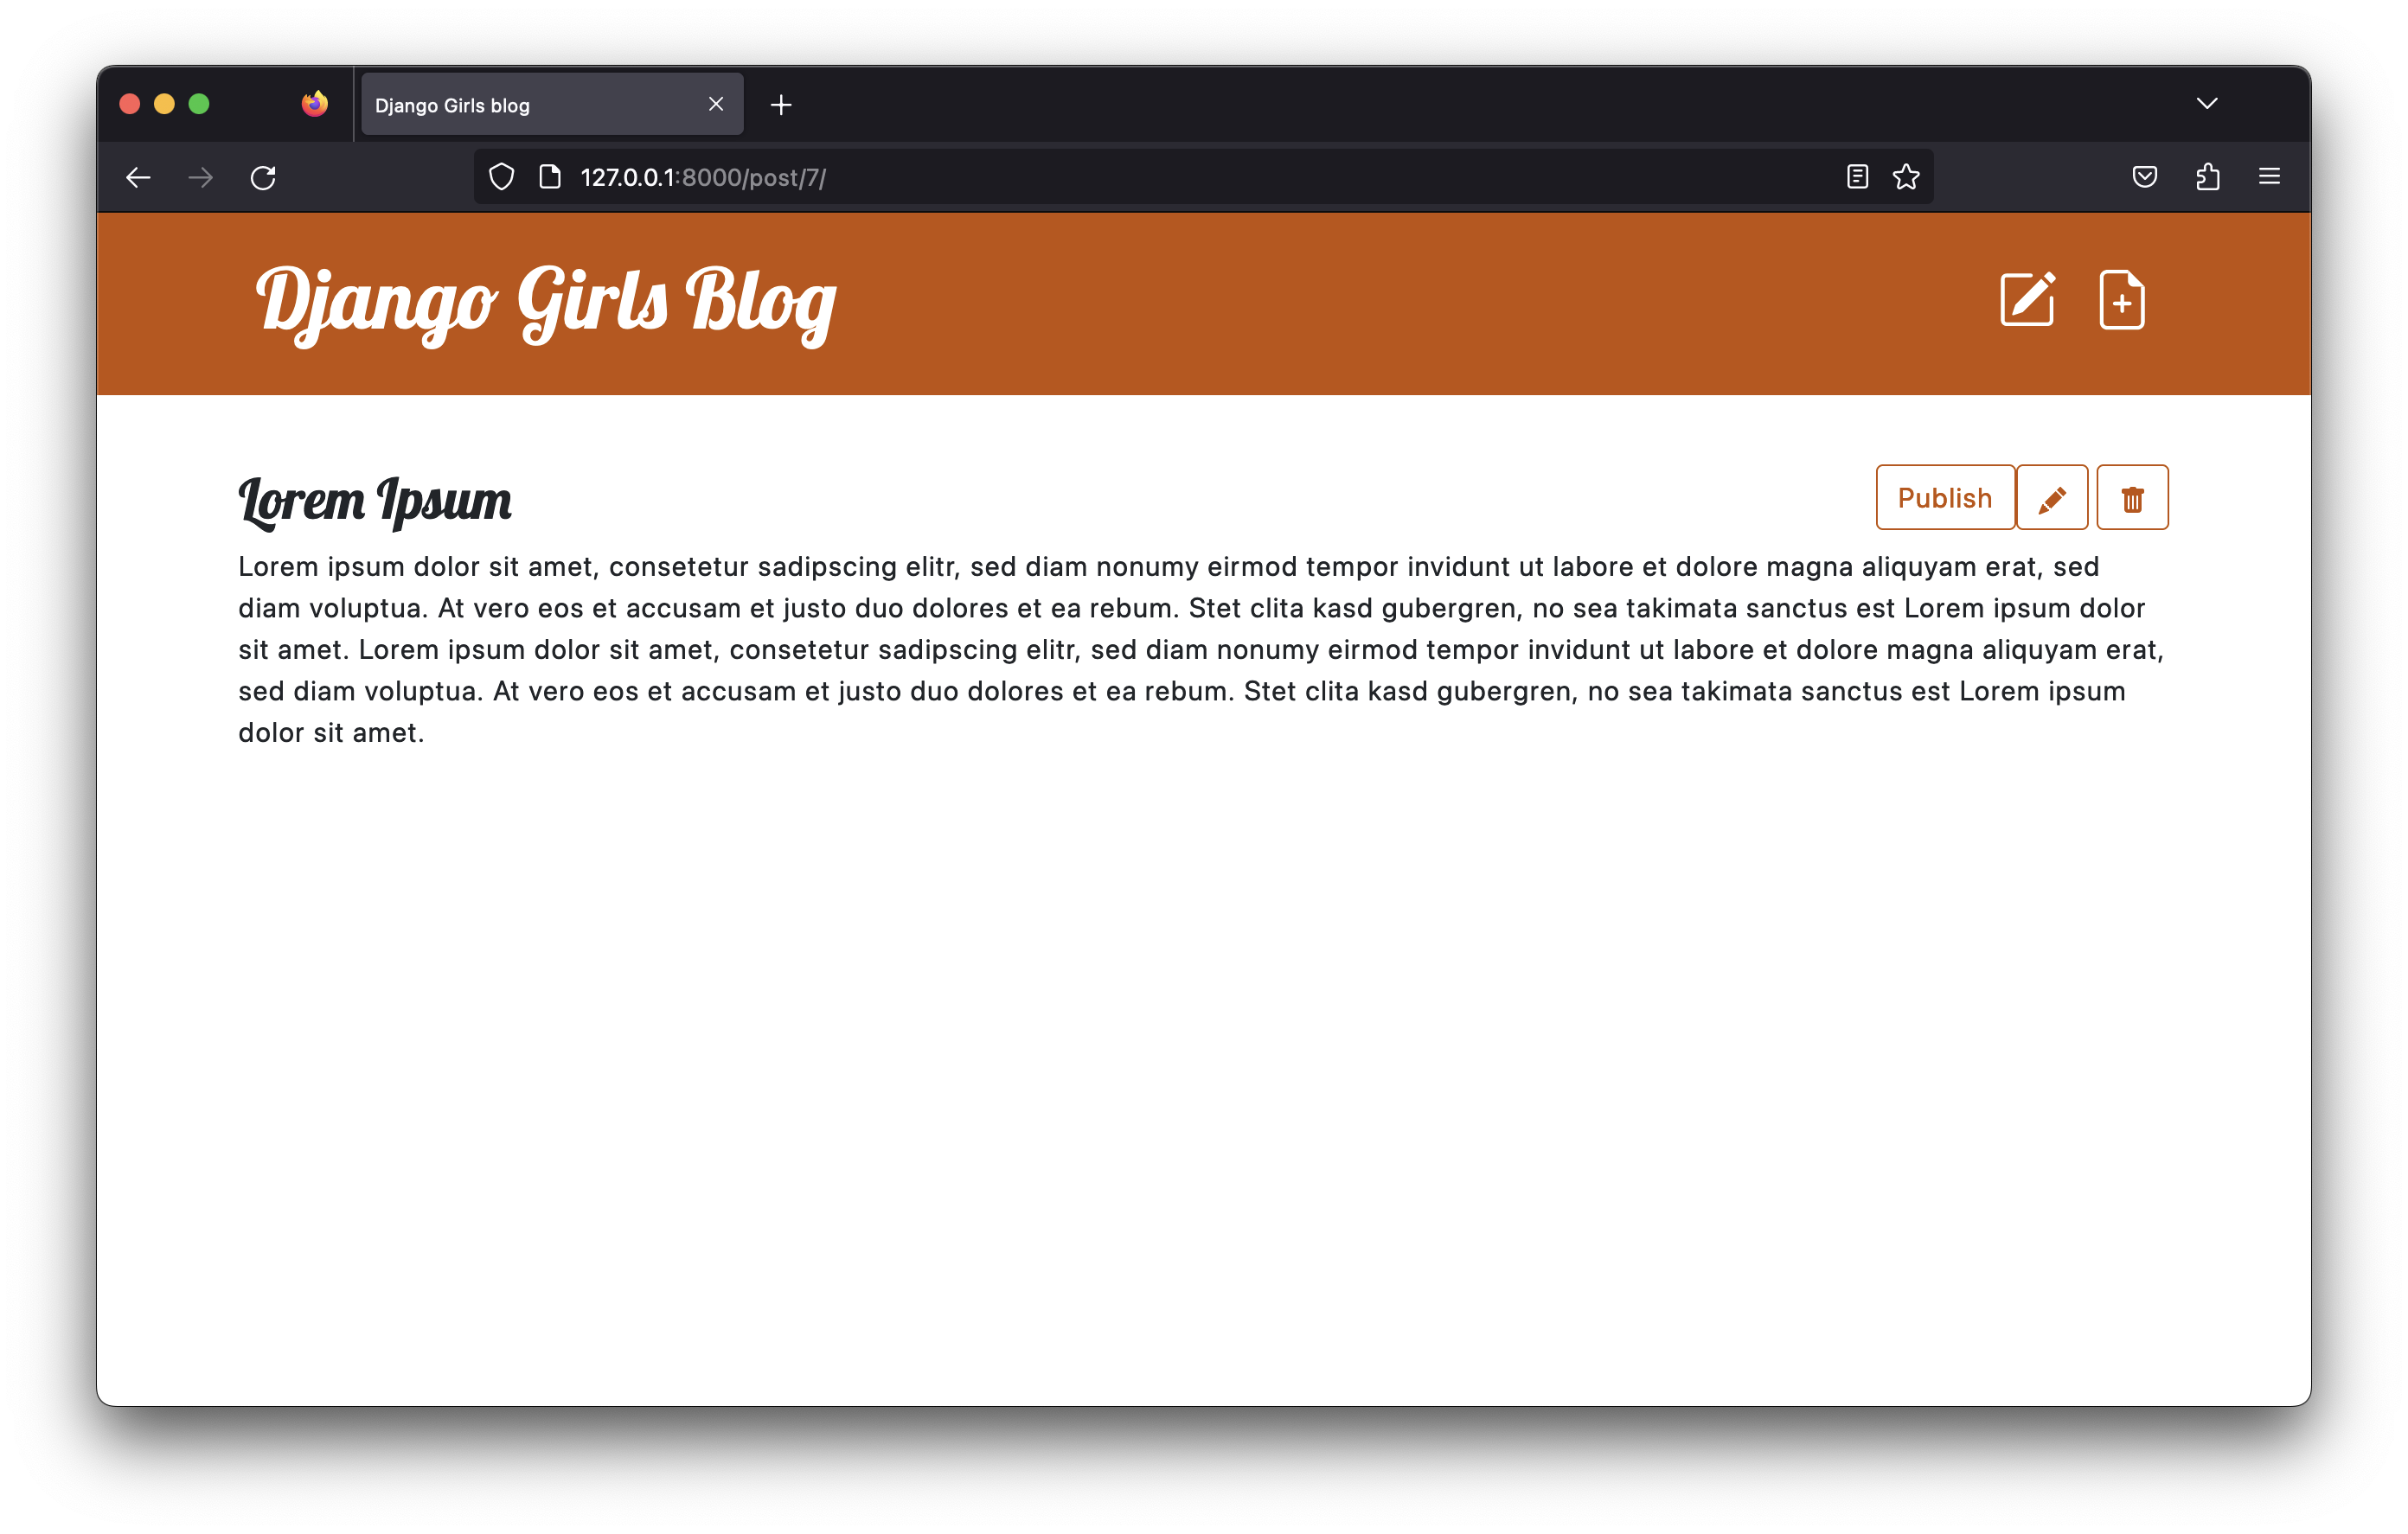
Add publish button
It would be nice to have a button on the blog post detail page that will immediately publish the post, right?
Let's open blog/templates/blog/post_detail.html and change these lines:
{% if post.published_date %}
    <div class="date">
        {{ post.published_date }}
    </div>
{% endif %}
into these:
{% if post.published_date %}
    <div class="date">
        {{ post.published_date }}
    </div>

    {% else %}
    <aside class="actions">
        <a class="btn btn-secondary" role="button" href="{% url 'post_publish' pk=post.pk %}">Publish</a>
    </aside>
{% endif %}
As you noticed, we added {% else %} line here. That means, that if the condition from {% if post.published_date %} is not fulfilled (so if there is no published_date), then we want to do the lines with <form ... </form>. But wait -- why are we bothering with a form here? There are no fields to fill in. Why are we not creating the publish button using an <a class="btn"> element like we did before?
So far, we have glossed over the difference between user actions which only retrieve data to show (like listing the posts), on one hand, and actions which change the data (like creating a new post) on the other hand. It is useful for all kinds of software running on the web (including your web browser) to be able to tell the difference between the two, before sending the relevant requests. To facilitate this, the web standards define GET requests as retrieval-only operations, and POST requests as potentially-data-changing operations.
As you may have noticed, when a user clicks an <a> element, the browser sends out a GET request. So these elements are not suitable for data-changing operations. Since publishing the blog-post changes the data on the server, an <a> element is not suitable here. In order to generate a POST request, we need to create a form.
Now, let's take a look at the details of the form. We are using a new attribute, action, to specify that the form is submitted to a URL that is different from the one on which it is presented. As before, we are using a {% url %} template-tag, and are passing a pk variable to it. The rest is as it was with the edit form -- the {% csrf_token %} for security, and the submit button.
Time to create a URL (in blog/urls.py):
path('post/<int:pk>/publish/', views.post_publish, name='post_publish'),
and finally, a view (as always, in blog/views.py):
def post_publish(request, pk):
    post = get_object_or_404(Post, pk=pk)
    if request.method=='POST':
        post.publish()
    return redirect('post_detail', pk=pk)
Note that we check the request method before executing the operation -- although the pages we will emit will not include a direct link to the URL of this view, and so one could think this check is redundant, in practice this sort of "defensive programming" often pays off, preventing damage which could have been caused by bugs.
Remember, when we created a Post model we wrote a method publish. It looked like this:
def publish(self):
    self.published_date = timezone.now()
    self.save()
Now we can finally use this!
And once again after publishing the post we are immediately redirected to the post_detail page!

Congratulations! You are almost there. The last step is adding a delete button!
Delete post
Let's open blog/templates/blog/post_detail.html once again and add these lines:
<a class="btn btn-secondary" href="{% url 'post_remove' pk=post.pk %}">
    {% include './icons/trash-fill.svg' %}
</a>
just under a line with the edit button.
Now we need a URL (blog/urls.py):
path('post/<int:pk>/remove/', views.post_remove, name='post_remove'),
Now, time for a view! Open blog/views.py and add this code:
def post_remove(request, pk):
    post = get_object_or_404(Post, pk=pk)
    if request.method=='POST':
        post.delete()
    return redirect('post_list')
The only new thing is to actually delete a blog post. Every Django model can be deleted by .delete(). It is as simple as that!
And this time, after deleting a post we want to go to the webpage with a list of posts, so we are using redirect.
Let's test it! Go to the page with a post and try to delete it!
Yes, this is the last thing! You completed this tutorial! You are awesome!