


Change Website Homepage to Wagtail Blog Homepage
The Wagtail admin has a nicer and a more user-friendly interface compared to the default Django admin user interface. For this reason, we would rather use our Wagtail blog as our main blog and ignore the blog we created in the main tutorial.
We will not remove our initial blog, we will leave it as it is as we may need to use it for more learning. We will
however change the root of our project to point to our Wagtail blog. Make the following changes to your
mysite/urls.py as shown below:
First change the URL for your first blog to the following:
path('blog/', include('blog.urls')),
Next change the URL for the Wagtail blog to the following:
path('', include(wagtail_urls)),
Your mysite/urls.py should now look like below:
mysite/urls.py
from django.conf import settings
from django.conf.urls.static import static
from django.contrib import admin
from django.urls import include, path

from wagtail.admin import urls as wagtailadmin_urls
from wagtail import urls as wagtail_urls

urlpatterns = [
    path('admin/', admin.site.urls),
    path('blog/', include('blog.urls')),
    path('cms/', include(wagtailadmin_urls)),
    path('', include(wagtail_urls)),
] + static(settings.MEDIA_URL, document_root=settings.MEDIA_ROOT)
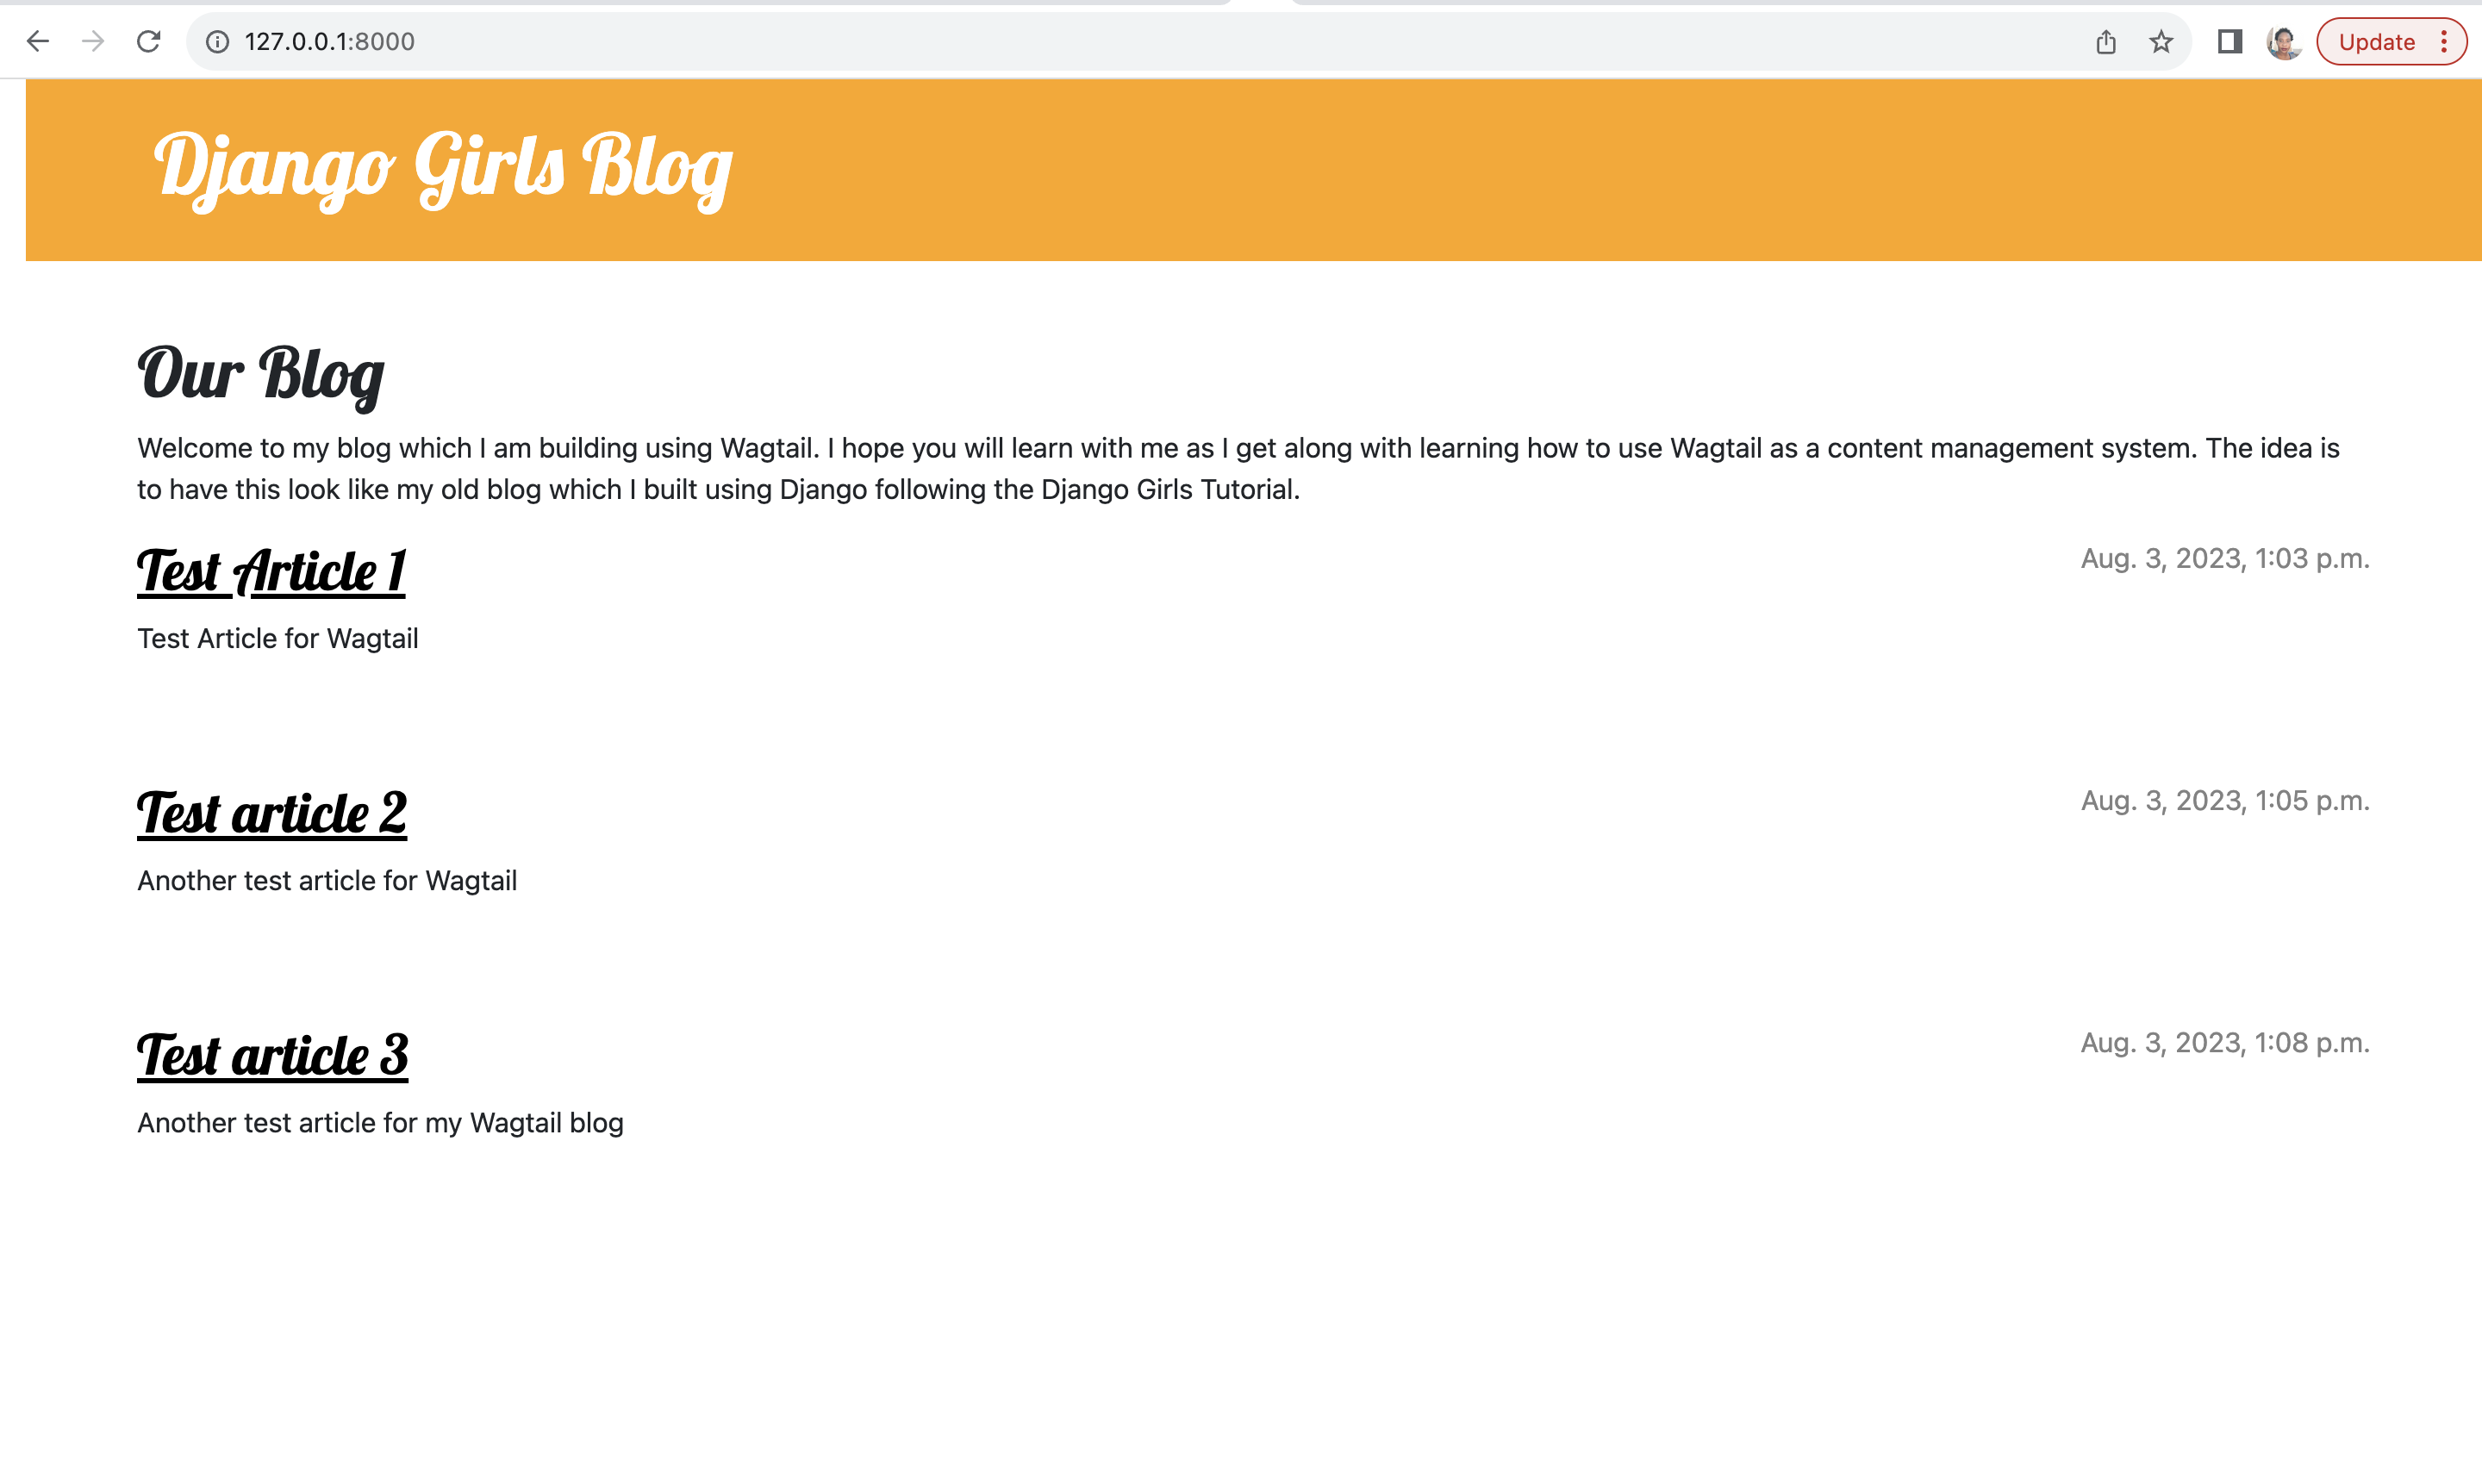
This will make your Wagtail accessible by visiting http://127.0.0.1:8000 as shown below
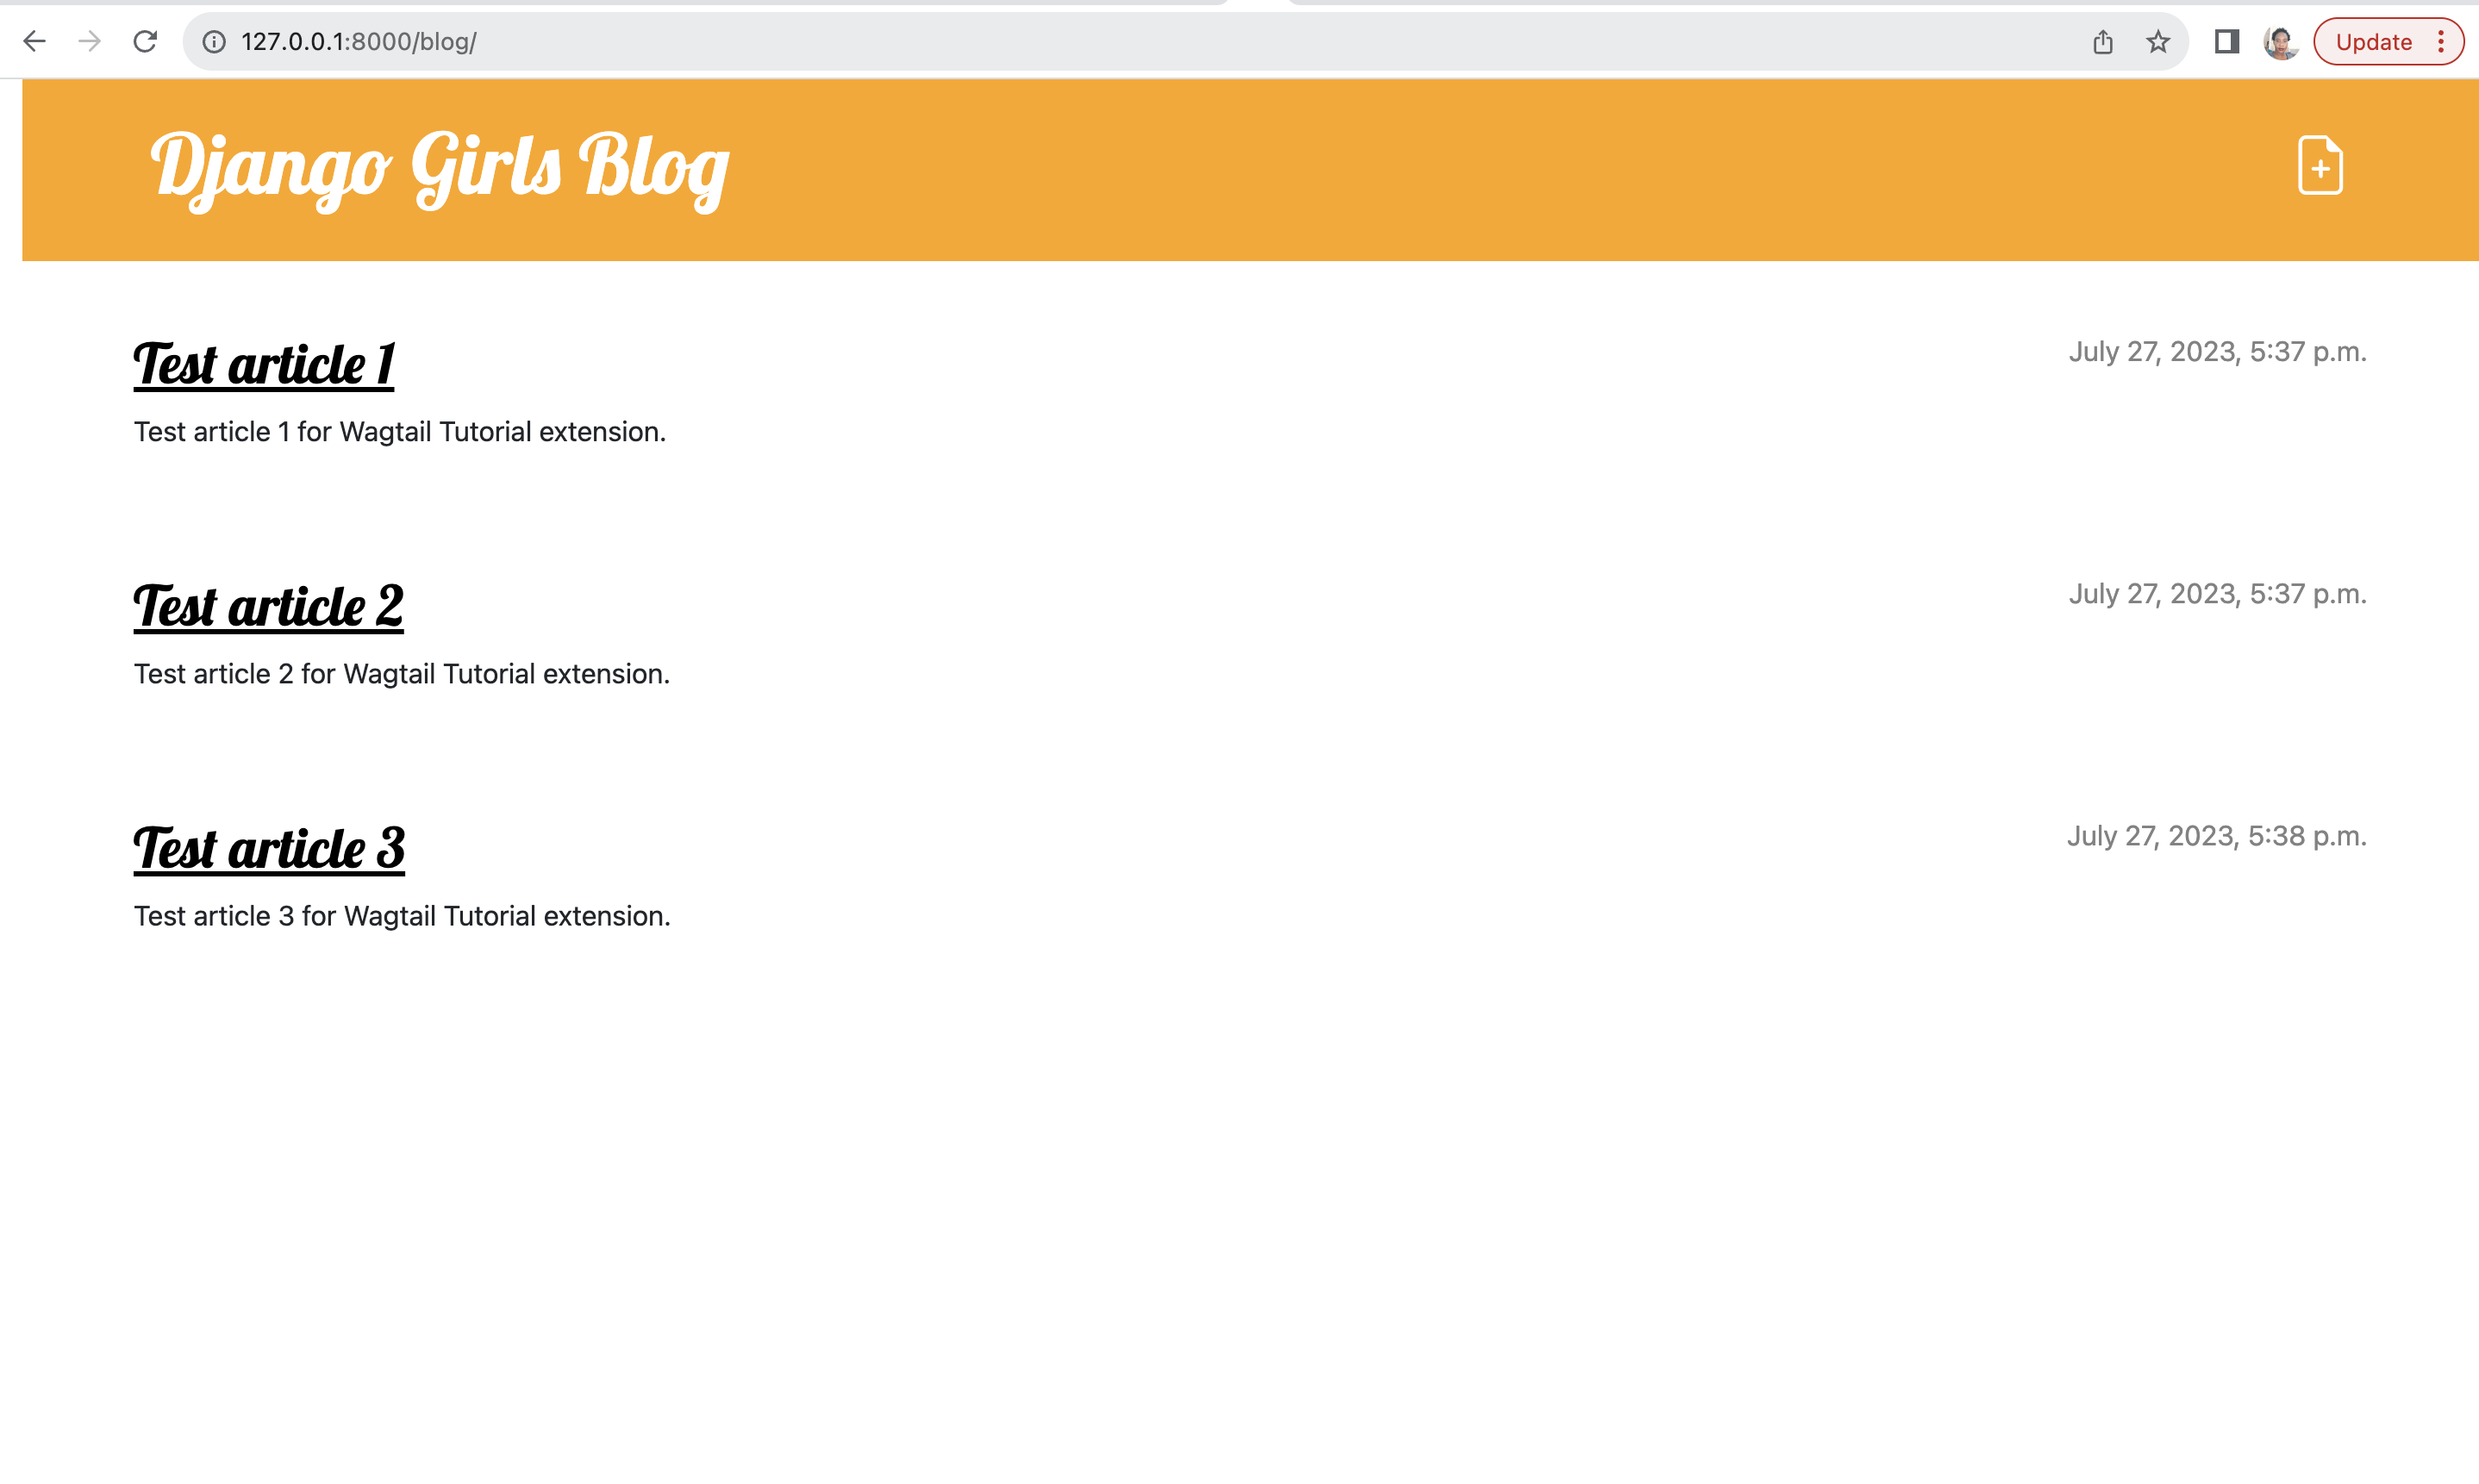
and your first blog will now be at http://127.0.0.1:8000/blog/ as shown below.
Committing our changes to GitHub
Now that we have managed to get Wagtail working well with out blog, we can deploy our changes to our live website which we deployed to PythonAnywhere earlier on during the main tutorial. To do this, we need to first push our code to GitHub as we have done before by typing the following in our command line:
(myvenv) ~/djangogirls$ git status
This will list all the files we have changed. Once we have confirmed those are the changes we have made, we can go ahead and add the files to be committed by typing the following command:
(myvenv) ~/djangogirls$ git add .
Next we need to add a commit message for our changes to be saved by typing the following command:
(myvenv) ~/djangogirls$ git commit -m "Add Wagtail to our blog"
Lastly, we need to push the commit to GitHub by typing the following command:
(myvenv) ~/djangogirls$ git push origin HEAD
This will push our new changes to GitHub and we are now ready to deploy these changes to PythonAnywhere!
Deploying the changes to PythonAnywhere
To deploy our changes to PythonAnywhere and click Consoles and click on
Bash Console in virtualenv to open a new Bash console with an activated virtual environment and then type in the
following command:
$ git pull origin HEAD
This command will pull your changes from GitHub to your PythonAnywhere project.
Next, you need to update the requirements for your project by installing Wagtail and its dependencies. Since we updated our requirements file, you only need to type in the following command to install the required packages:
$ pip install -r requirements.txt
Next step is to run migrations for the new models and create the necessary tables in the database. To do this, type the following command:
$ python manage.py migrate
Next, you need to run the collectstatic command to copy the static files required by Wagtail to the static root
folder specified in our settings.py file.
$ python manage.py collectstatic
Lastly, go to Web tab and reload your webapp by clicking the Reload <your-username>.pythonanywhere.com button and
open https://<your-username.pythonanywhere.com in another tab to see your blog now using Wagtail CMS.
You should get the Welcome to your new Wagtail site! on your homepage to show that Wagtail is now working as your
website root.
To change the root page of your Wagtail blog visit https://<your-username.pythonanywhere.com/cms/ and login.
Then follow the steps in Changing the Wagtail Homepage section of this tutorial to create a new homepage and change it to be the root of the blog.
To create new posts, follow instructions in the Adding posts section of this tutorial.
After adding your posts, you should see that only posts/pages that have been published are the ones displayed on your blog.
In other words, Wagtail only shows posts which are live and a post is only live after you click the Publish button.
The Save draft button merely saves the post without publishing it or making it live.
Also, take note that live posts are displayed in the order in which they are published, that is, they are ordered by date.
In Django, the statement to get blog posts would look like BlogPage.objects.filter(published=True).order_by(published_date).
That's all for this tutorial. If you want to learn more about Wagtail, you can read the Wagtail documentation or search for more tutorials on Wagtail online.
Happy coding!